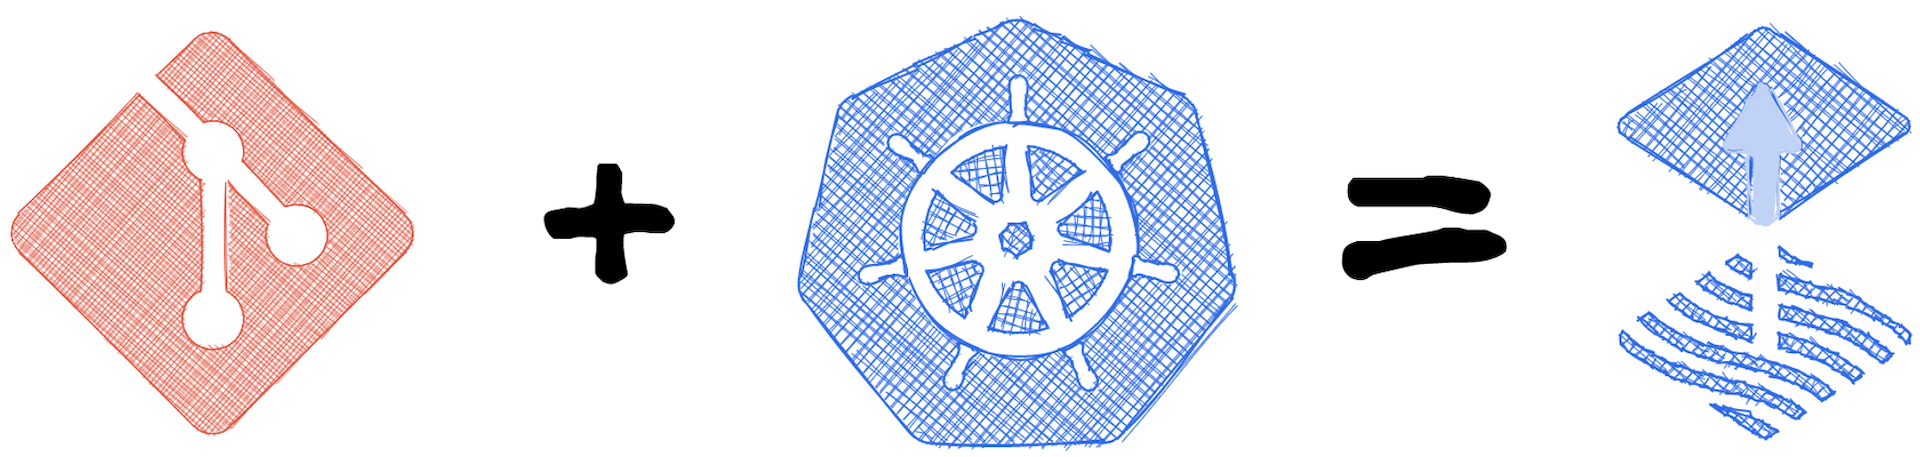
A while ago, I started to change the workflow for my Kubernetes cluster. Instead of manually applying YAML files and Helm charts through the terminal, I switched to a GitOps workflow. All YAML files are stored in a Git repository, and changes in the repository are pulled and applied by an application in the Kubernetes cluster. This setup offers me the following advantages:
- I have a simple way to undo changes through the repository, and a history of all my changes.
- Changes can also be made through other devices with access to the Git repository, such as my iPad, iPhone, or work computer.
- Container images versions can be automatically increased when a new version is available, and I can see from the repository that the version number in the manifest has been updated.
- Changes are pulled and not pushed, so it is not necessary to make the cluster accessible from outside in order to deploy a new version of the website, as I had done with GitLab CI until then.
As already mentioned, an application in the cluster loads changes from the Git repository and applies them. I chose Flux to take on this job in my cluster. I can't remember exactly why I chose Flux over something like ArgoCD or another application, but so far I don't regret my decision and I'm very satisfied with Flux and my setup.
Installing Flux
It is recommended to install the Flux CLI Tool, which simplifies the installation of Flux in a Kubernetes Cluster. The installation of the Flux CLI Tool is described in the Flux Documentation.
After installing Flux CLI, you can add Flux to the cluster using the Bootstrap command. Before doing so, you should consider where to host the Git repository and if you want to install any optional Flux components.
I have chosen Github as a repository hosting platform, but Github Enterprise and other providers are also supported. Self-hosted repositories can also be used.
When installing Flux, I additionally installed two more components to automatically increase the version numbers of the container images. If one wants to use the option of automatic version number increase, it is important that the user accessing the Git repository has write permissions.
The Bootstrap command in my case looks like this:
export GITHUB_USER=<your-username>
export GITHUB_TOKEN=<your-token>

flux bootstrap github \
  --components-extra=image-reflector-controller,image-automation-controller \
  --read-write-key \
  --owner=$GITHUB_USER \
  --repository=homelab \
  --branch=main \
  --personal \
  --path=./
The Bootstrap command automatically creates the repository and sets up the necessary configurations for connecting to the repository in the cluster. Additionally, the required Flux components are installed in the Flux system namespace.
The folder structure in the created repository looks like this:
├── flux-system
│   ├── gotk-components.yaml
│   ├── gotk-sync.yaml
│   └── kustomization.yaml
├── apps
│   ├── base
│   ├── staging
│   └── production
├── infrastructure
│   ├── base
│   ├── staging
│   └── production
└── README.md
The file gotk-sync.yaml in the flux-system folder contains your configurations, such as the information about your Git repository and the intervals in which the repository should be checked for changes. My configuration looks like this:
# This manifest was generated by flux. DO NOT EDIT.
---
apiVersion: source.toolkit.fluxcd.io/v1beta2
kind: GitRepository
metadata:
  name: flux-system
  namespace: flux-system
spec:
  interval: 1m0s
  ref:
    branch: main
  secretRef:
    name: flux-system
  url: ssh://git@github.com/...
---
apiVersion: kustomize.toolkit.fluxcd.io/v1beta2
kind: Kustomization
metadata:
  name: flux-system
  namespace: flux-system
spec:
  interval: 10m0s
  path: ./
  prune: true
  sourceRef:
    kind: GitRepository
    name: flux-system
Even though Flux adds the comment "DO NOT EDIT.", we will need to make a change to this configuration later on.
Deploy applications
To install an application in the cluster using Flux, you just need to add the corresponding YAML files. I always create a separate folder in the before mentioned directory structure (usually in apps → production) for each application. In the folder I then create the various YAML files and number them as before to ensure they are applied in the correct order. For example:
├── flux-system
│   ├── gotk-components.yaml
│   ├── gotk-sync.yaml
│   └── kustomization.yaml
├── apps
│   ├── base
│   ├── staging
│   └── production
│       └── homepage
│           ├── 001-namespace.yaml
│           ├── 002-deployment.yaml
│           ├── 003-service.yaml
│           └── 004-ingress.yaml
├── infrastructure
│   ├── base
│   ├── staging
│   └── production
└── README.md
After the changes were committed and pushed, they will be applied to the cluster after short time. If desired, notifications about Flux can be sent via MS Teams, Slack or Discord when a change has been applied. For example, I get notified through Discord. How to set up the notifications is documented here.
Encrypt Secrets
In contrast to all other manifest YAML files, the YAML files for secrets should not be stored directly in the Git repository, as there is a risk that the secrets will be compromised. To still store the secrets together with the other manifest files and utilise the advantages of GitOps, SOPS from Mozilla can be used.
SOPS allows for the encrypted storage of secrets in a Git repository and their automatic decryption within Kubernetes clusters. To do this, a key pair of public and private keys must be generated. The private key is then stored as a secret in the Kubernetes cluster to decrypt YAML files that were previously encrypted with the public key.
Flux already provides the necessary components and describes various ways to use SOPS in the documentation. I am using a combination of SOPS and the encryption tool Age, a more modern variant of the also supported PGP, in my Kubernetes cluster.
In order to use SOPS and Age, they must first be installed on the computer. I used the MacOS Package Manager brew for this:
# Install sops und age
brew install sops age
After installation, a new key pair must be generated by running the following command:
# "Create public and private keys"
age-keygen -o keys.txt
The content of the generated file keys.txt should look like this:
# created: 2023-09-27T13:18:54+02:00
# public key: age15qj3pa5mnf4un6yq5hpv0rxs2r8zfy84dk0c42ed2at7ca9mqgps9kxm69
AGE-SECRET-KEY-1AFE7AVFX4RKFRD8F8DCKMVUZEAY69PE0WA46L28VFTQTVUJHDCGS64DUFY
The generated key must now be stored as a Secret in the Kubernetes Cluster. To do this, this command can be used:
cat keys.txt |
kubectl create secret generic sops-age \
--namespace=flux-system \
--from-file=age.agekey=/dev/stdin
In order for Flux to use the created secret for decryption, the secret name used must be stored in the Flux configuration. To do this, the gotk-sync.yaml file, which is located in the Flux-System folder, must be extended by the decryption item in the customisation configuration:
apiVersion: kustomize.toolkit.fluxcd.io/v1beta2
kind: Kustomization
metadata:
  name: flux-system
  namespace: flux-system
spec:
  interval: 10m0s
  path: ./
  prune: true
  sourceRef:
    kind: GitRepository
    name: flux-system
  decryption:
    provider: sops
    secretRef:
      name: sops-age
Flux is now able to receive encrypted secrets and make them available to Kubernetes in decrypted form. As already mentioned, these are first encrypted locally with SOPS and Age before they are added to the Git repository. To avoid specifying where the Age key pair is located each time, you can move it to the SOPS folder, where SOPS will automatically find and use it. To do this, the following command must be executed on MacOS:
mv keys.txt ~/Library/Application\ Support/sops/age/keys.txtYou can then encrypt a Secret YAML file with the following command:
sops --encrypt --encrypted-regex '^(data|stringData)$' --in-place my-scret.yamlThis command replaces the content of the specified file with encrypted values. The YAML file with the encrypted values can now be added to the Git repository.
The encryption can also be undone locally with the private key if desired:
sops -d -i my-secret.yamlExample
Before
apiVersion: v1
kind: Secret
metadata:
  name: mysecret
type: Opaque
data:
  username: YWRtaW4=
  password: MWYyZDFlMmU2N2Rm
After
apiVersion: v1
kind: Secret
metadata:
  name: mysecret
type: Opaque
data:
  username: ENC[AES256_GCM,data:WLMHAA237HU=,iv:GU7dZ/AeUBWVQrgAhVp7Y6OTWzTTkBmBJhjmVS7AcNc=,tag:5LUIp2FRmlhg0s9qIPsE0A==,type:str]
  password: ENC[AES256_GCM,data:QXbkpdThEmQ2kaUDP0MOqA==,iv:wANBzzC2vBLnBpfs5hT/Ah7F3nQdJK18Jd3tdQWM/Do=,tag:EtwXO+eDPX+14zxc5+m+UQ==,type:str]
sops:
  kms: []
  gcp_kms: []
  azure_kv: []
  hc_vault: []
  age:
    - recipient: age1vcsluhx9fuqw2lvzar3xdj44qndag07f077jjn236dthhe56qqfses2nam
      enc: |
        -----BEGIN AGE ENCRYPTED FILE-----
        YWdlLWVuY3J5cHRpb24ub3JnL3YxCi0+IFgyNTUxOSB5Y0dxZ1kvNFAxSXQ4R0hM
        VlM2OW52NG5CMGQ1N2dYNjBmNStiTlhzZG1JCldRWjZTcy9yU3pmQUI3ZXBQN2hP
        bWszQVFOMWZaWXNZOGIzVG5YOTlMcVUKLS0tIFRKaUIxcmRXR0xuclRZRS9tT3BQ
        c1BUMms4Q09LRzVhUU43TzBZSEVYaTQKIEJiOe0CazOwY3QSo7/ZEdrw6QzkW3xt
        DxPz7onVvMQf0j0TtjPsyz8T5KTw1GPUEdncilUzobqyNbNT/TOoCA==
        -----END AGE ENCRYPTED FILE-----
  lastmodified: "2023-09-27T11:25:36Z"
  mac: ENC[AES256_GCM,data:th0xrQ+/oAG3vP/BtFDB0bj1O/o7rk72SOJ+wuZDqCkfnozan/I8ulqzczj8ujrsI5yhH80QRDZ26Qm29lhiqnvjDoR31Z6S0cwOgKlCzpzDzummJXQL/Vs/L5xJtrdShLUAGCvVLGaEejAeqFFyR/ver44Qa1AKGEenawgOsbk=,iv:YNpOPJpyZ7ttbeYZWiNl4U9VRF/KORIOw9uZ3B7v9j4=,tag:1gL+ZWFTlcURTjQkh2c8tg==,type:str]
  pgp: []
  encrypted_regex: ^(data|stringData)$
  version: 3.7.3
Automatic Version Upgrades
One of the advantages mentioned at the beginning is that Flux offers the possibility to automatically update the version number of a Docker image when a new version is available.
I have already installed the necessary Flux components during the initial installation. Specifically, these options enabled the automatic updating of the image version:
# ...
--components-extra=image-reflector-controller,image-automation-controller \
--read-write-key \
# ...
A configuration file must be created so that Flux knows how changes should be written to the Git repository. This file can be used to configure the commit message and the author, or to which Git branch the changes should be written. This can be used if changes to the version number are to be applied to the main branch via a pull request.
The configuration file can be generated with the following Flux CLI command:
flux create image update flux-system \
--git-repo-ref=flux-system \
--checkout-branch=main \
--push-branch=main \
--author-name=fluxcdbot \
--author-email=fluxcdbot@users.noreply.github.com \
--commit-template="" \
--export > flux-system/flux-system-automation.yaml
You can customize the command as you wish or you can adjust the generated configuration file afterwards:
apiVersion: image.toolkit.fluxcd.io/v1beta1
kind: ImageUpdateAutomation
metadata:
  name: flux-system
  namespace: flux-system
spec:
  git:
    commit:
      author:
        email: fluxcdbot@users.noreply.github.com
        name: fluxcdbot
      messageTemplate: ""
    push:
      branch: main
  interval: 5m0s
  sourceRef:
    kind: GitRepository
    name: flux-system
  update:
    strategy: Setters
To make the automatic update of the Docker image version possible, two YAML files must be created. The first YAML file is used to configure the image repository and the interval at which the system should check whether a new version exists. This YAML file can either be generated with the following command using the Flux CLI tool:
flux create image repository [Name] \
--image=[Repository-Name] \
--interval=[Interval] \
--export > [YAML-Path]

# Example with n8n
flux create image repository n8n \
--image=n8nio/n8n \
--interval=24h \
--export > ./apps/production/n8n/001-image-repository.yaml
Or you can create the YAML file yourself and use this example as a template:
apiVersion: image.toolkit.fluxcd.io/v1beta1
kind: ImageRepository
metadata:
  name: n8n
  namespace: flux-system
spec:
  image: n8nio/n8n
  interval: 24h
The second YAML file is used to control when a version number is to be updated: If semver is used for the version number of the Docker image, it can be configured, for example, that only minor and patch versions may be updated automatically. The following command can be used to generate this YAML file:
flux create image policy [Name] \
--image-ref=["Name of Previously Created Image Repository"] \
--select-semver=[Regel] \
--export > [YAML-Pfad]

# Example with n8n
flux create image policy n8n \
--image-ref=n8n \
--select-semver=">=0.0.0" \
--export > ./apps/production/n8n/001-image-policy.yaml
Or you can create it yourself:
apiVersion: image.toolkit.fluxcd.io/v1beta1
kind: ImagePolicy
metadata:
  name: n8n
  namespace: flux-system
spec:
  imageRepositoryRef:
    name: n8n
  policy:
    semver:
      range: ">=0.0.0"
The Flux documentation contains further examples of how to set the rule for semver. There are also example rules for other types of image versioning in this documentation.
With the two files created, Flux now checks the Docker repository at the defined interval to see whether new versions are available and whether these should be taken into account for the automatic update of the Docker image version number. In order for Flux to know where the version number should be updated, reference must be made to the created image policy in the deployment YAML of the application in the last step.
For this purpose, a comment is inserted in the line with the image reference, as in this example:
//...
containers:
- name: n8n
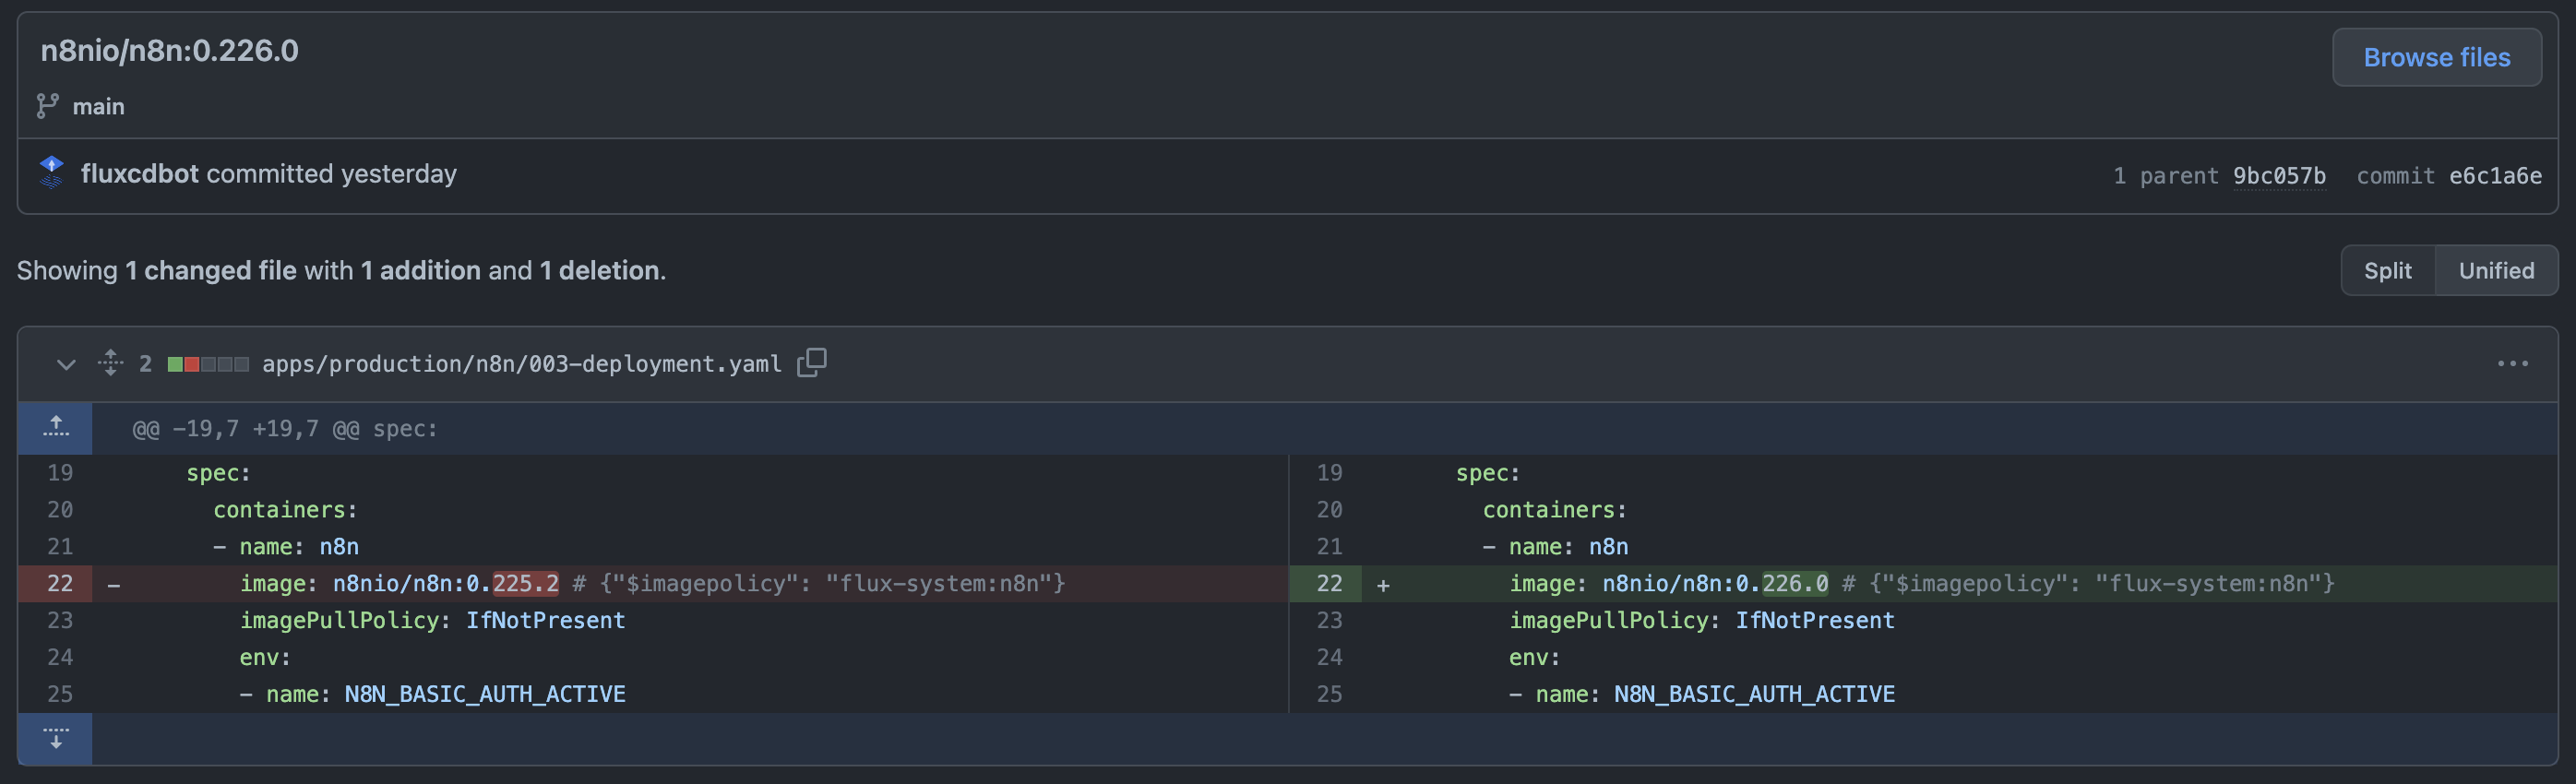
image: n8nio/n8n:0.226.0 # {"$imagepolicy": "flux-system:n8n"}
//...If everything has been configured correctly, the version number should now update automatically and you will see the commits from Flux for the change to the version number in the deployment YAML in the Git repository:
It is recommended to read the complete documentation on this topic, as Flux offers further options here, such as pausing the automatic update: Automate image updates to Git